| | Add more detail to a credit note |
| Description | Use the quick start guide to learn how to create a simple credit note. But what if you want to add more detail, such as a discount or a different VAT rate or ledger account? The information in this article shows you how. |
| Resolution | The delivery address on your credit note populates from the customer record you select. Change this on an individual credit note, if you need to. Don’t have an address for this customer at all? No problem. Just enter text such as ‘No address’ or ‘TBC’ into the address fields in order to create and save your credit note. Edit the address on the customer’s record later, if you need to. Ledger accounts are used to categorise and group your sales and other transactions. For example, if the credit note is for stationery, you might use a ledger account for Office Supplies. 
When you create a credit note, we use the default set on the customer record first. If you add a product or service to the credit note, we use the ledger account saved on the product or service record. You can change the ledger account shown on any of your credit note lines. Read more about ledger accounts Add a discount to individual items on your credit note, either as an amount or a percentage. To enter a discount as a fixed amount, enter the value in the Amount box and leave the percentage as zero. To enter a discount as a percentage, leave the value in the Amount box as zero and enter the percentage in the % box. Analysis types are tags that make it easier for you to analyse your accounts in more detail. There are three types: departments, cost centers, and projects. Once you’ve set analysis tags up, you can assign them when you create your credit notes. You can then produce reports using these tags, helping you to review your sales in more detail. For example, if you set up departments for each of your sales regions, you can apply those departments when you create credit notes. Later, you can produce reports that show credit notes for each region. Before you can add analysis types to a credit note, you need to set them up in Settings, Analysis Types. Once you've created them, add them to a credit note by clicking the ellipsis ( ) at the end of each item line: ) at the end of each item line: 
Learn more about analysis types When you create a credit note, we automatically use the VAT rate set as the default on the customer record. If you then add products or services, we use the VAT rate saved on the product or service record. Change the VAT rate on individual item lines by selecting the rate you want to use from the dropdown list. More about VAT rates Each credit note you create has space for you to add extra notes. Enter this information on each invoice as you create it. If you prefer, set up default terms and notes which will print on every credit note you create. To set up default text, go to Settings, Document Preferences, and scroll to the Notes section. Select the Credit Note tab. The notes you set up here will appear on every new credit note you create, but you can amend or add to these on individual credit notes. If you're crediting your customer for delivery or postage charges, enter the net amount in the Carriage box. You can apply a VAT rate if your shipping charges are subject to VAT. When you've finished adding items, the total Net, VAT, and gross amounts appear at the bottom of the credit note. The VAT is broken down by VAT rate, so you can see a separate line for each rate used on the credit note. If you would like to see a further breakdown of the VAT included on your credit note, select the View VAT Analysis link. This shows you a full breakdown of the VAT for the items you've put on the credit note, including the different VAT rates and a breakdown of values for goods and services: 
Attachments are a great way to keep track of any files you have that relate to this credit note. If you email the credit note to your customer, they can see the files you've attached. You can add up to 10 attachments to each credit note, using files of the following types: PDF, GIF, JPG, JPEG or PNG. The maximum size for each file is 2.5MB. Learn more about attachments Use the Customise menu at the bottom of the New Sales Credit Note page to jump to customisation settings. This saves you time when you want to customise credit notes for your business. 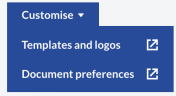
If you are using stock items, we create a stock movement transaction every time a stock is bought and sold. Whenever stock items are included on a credit note, we create a Negative Goods Out stock movement transaction. This increases your stock level as goods have been returned. You can easily view which sales invoices have been allocated to your sales credit notes. - Locate and open the credit note from the activity section on the contact record or, from the Sales tab.
- Click the Amount Paid value.
The allocation details of the transaction will appear here. To view further details, click the value in the Amount column. [BCB:299:UKI - Personal content block - Dane:ECB] [BCB:303:UKI - Search override - Accounting IE:ECB] [BCB:276:UKI - hide back button:ECB] |
|
